You want to get started with YouTube streaming – great!
YouTube works as most live streaming platforms in its core, but let’s go over the most important bits together.
Before starting a YouTube streaming you need to actually create a stream.
The creation process resembles closely a video upload because after the stream is done, the stream archive is treated just like a video.
Note: Before your first stream you have to wait a 24 hour safety period until you can actually start streaming
Create a YouTube Stream
As the first step you want to open your Live Dashboard and click the blue “Schedule Stream” Button in the top right corner.
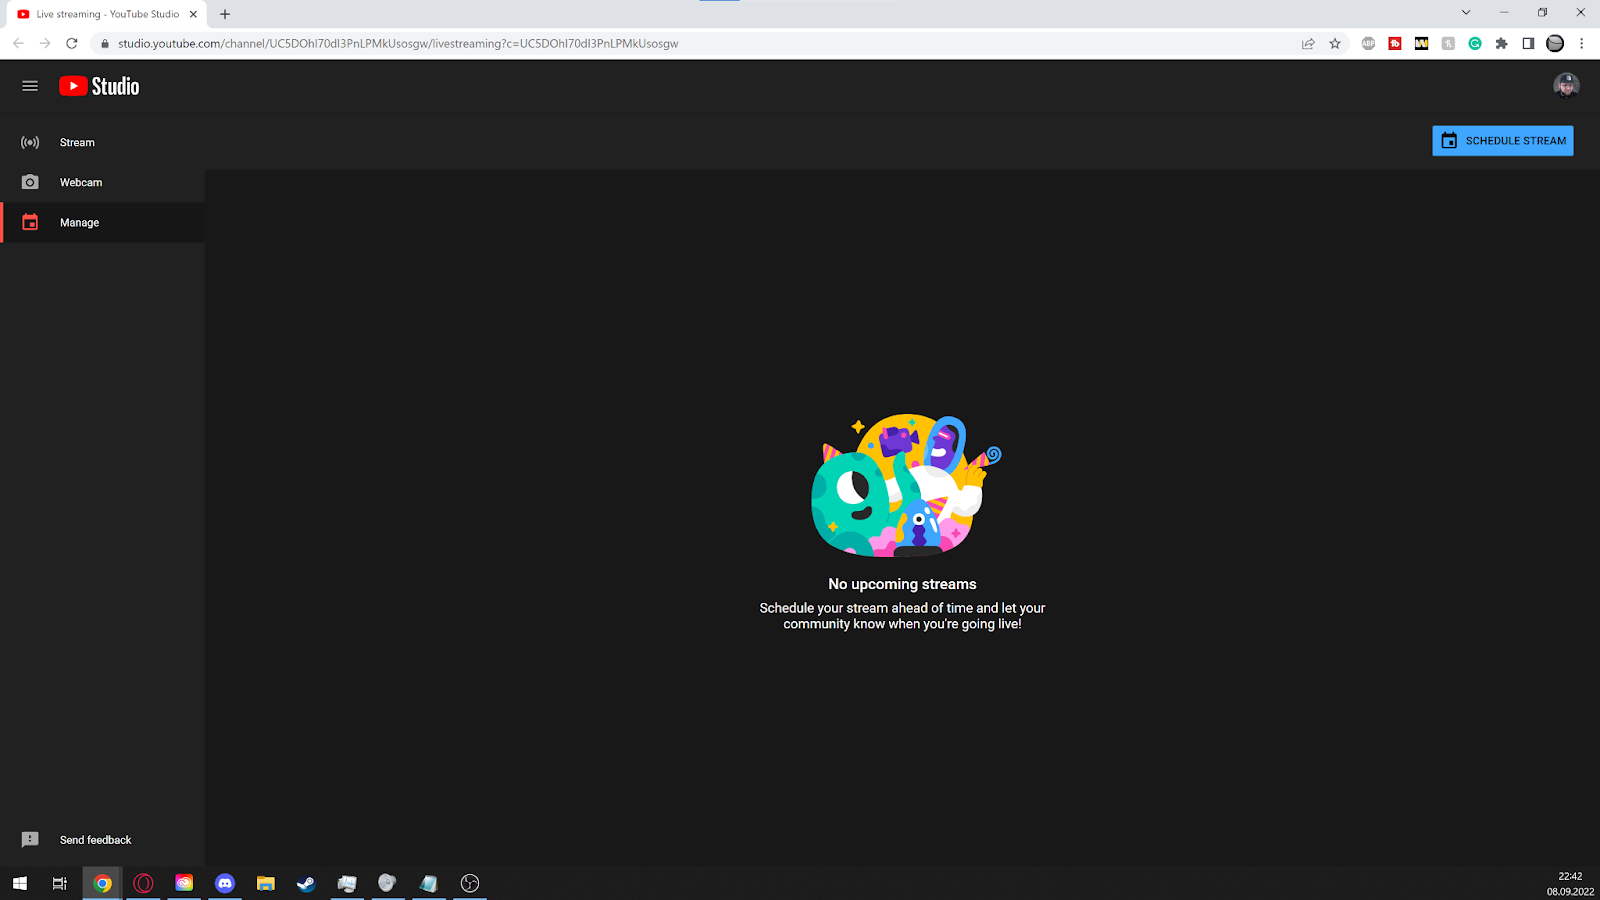
All your current and upcoming Streams will be listed here as well
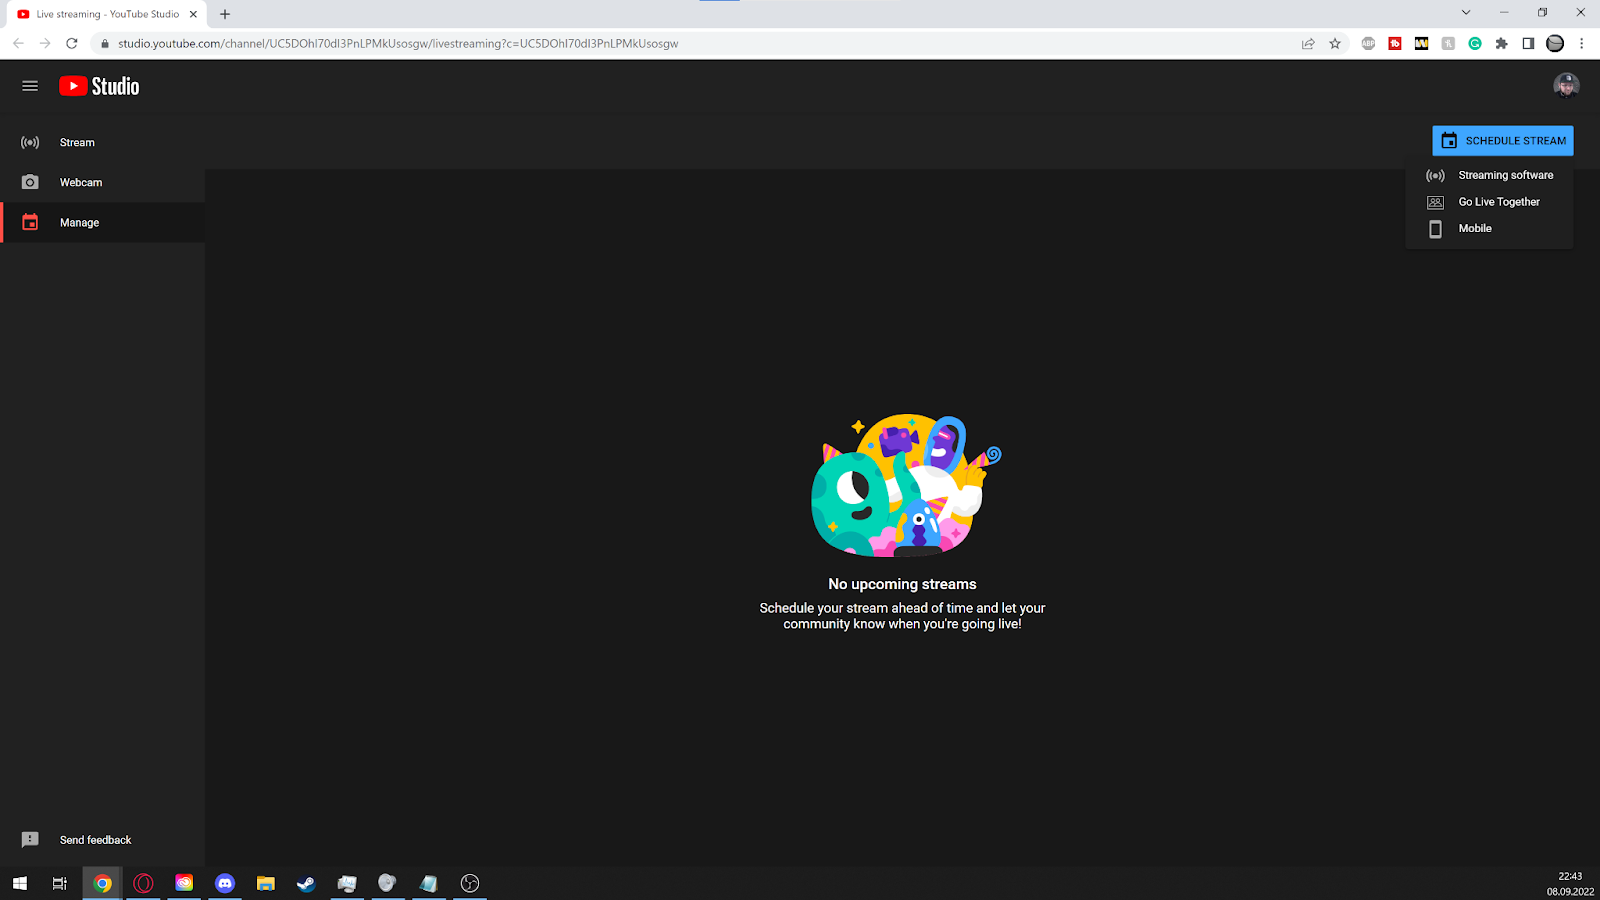
You can create 3 different kinds of Streams
Follow the Stream Creation process by providing a title, description and a thumbnail.
Don’t worry about making mistakes, you can still change those settings later.
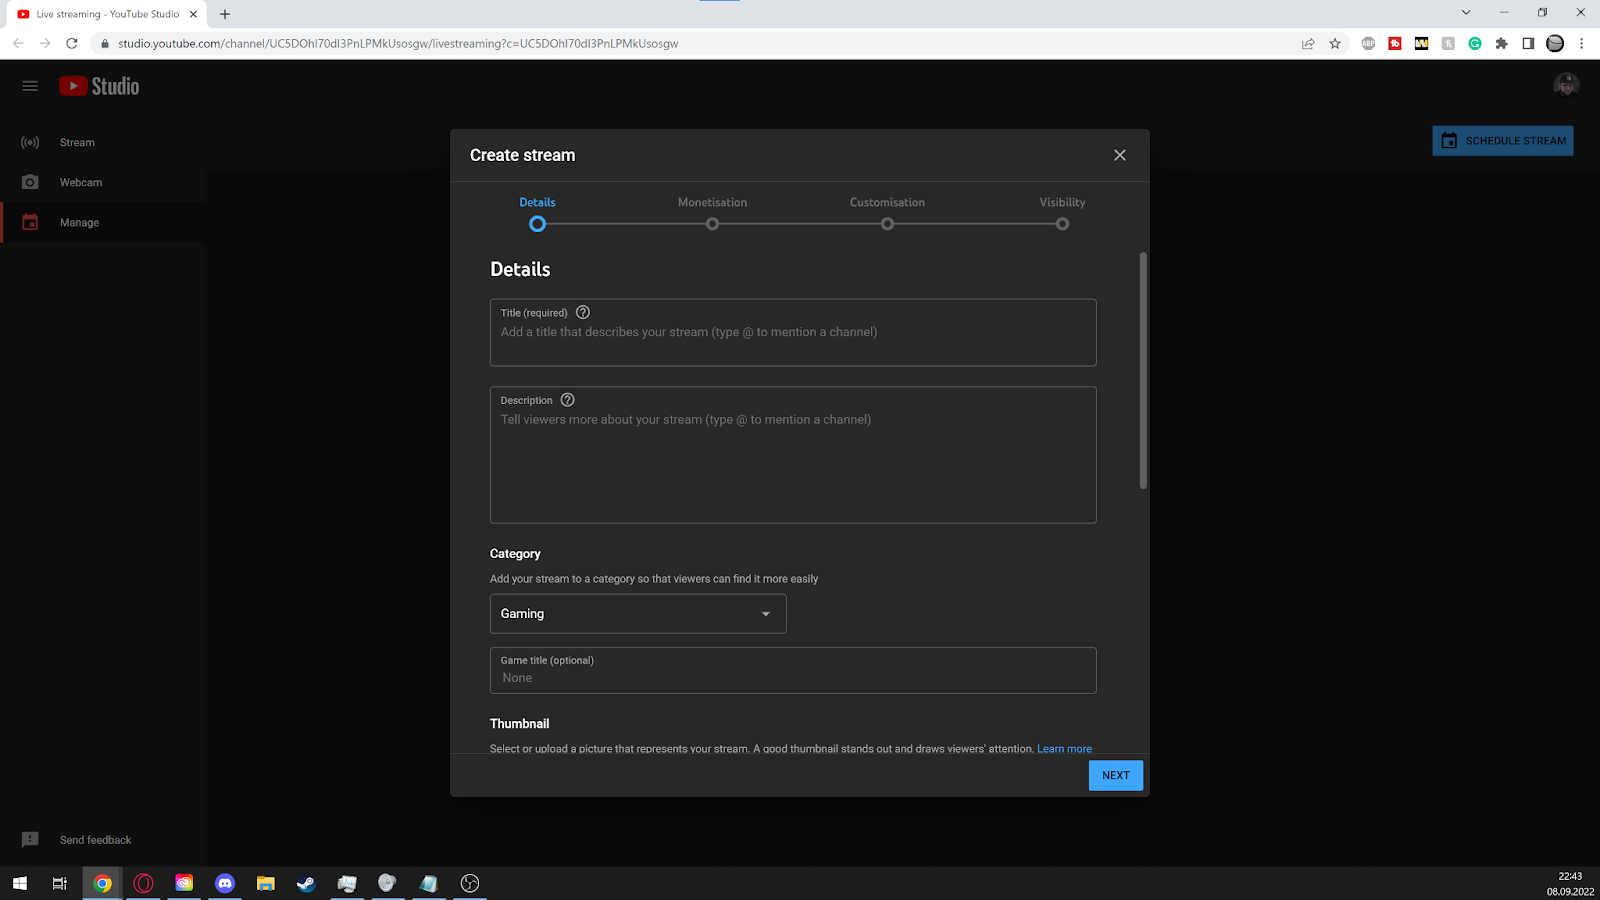
Add a title, description and select your category

Add a custom Thumbnail, and decide whether to automatically add the VOD to a playlist
If you are in the YouTube Partner Programm, you can also chose what type of ads you want to run on the livestream.
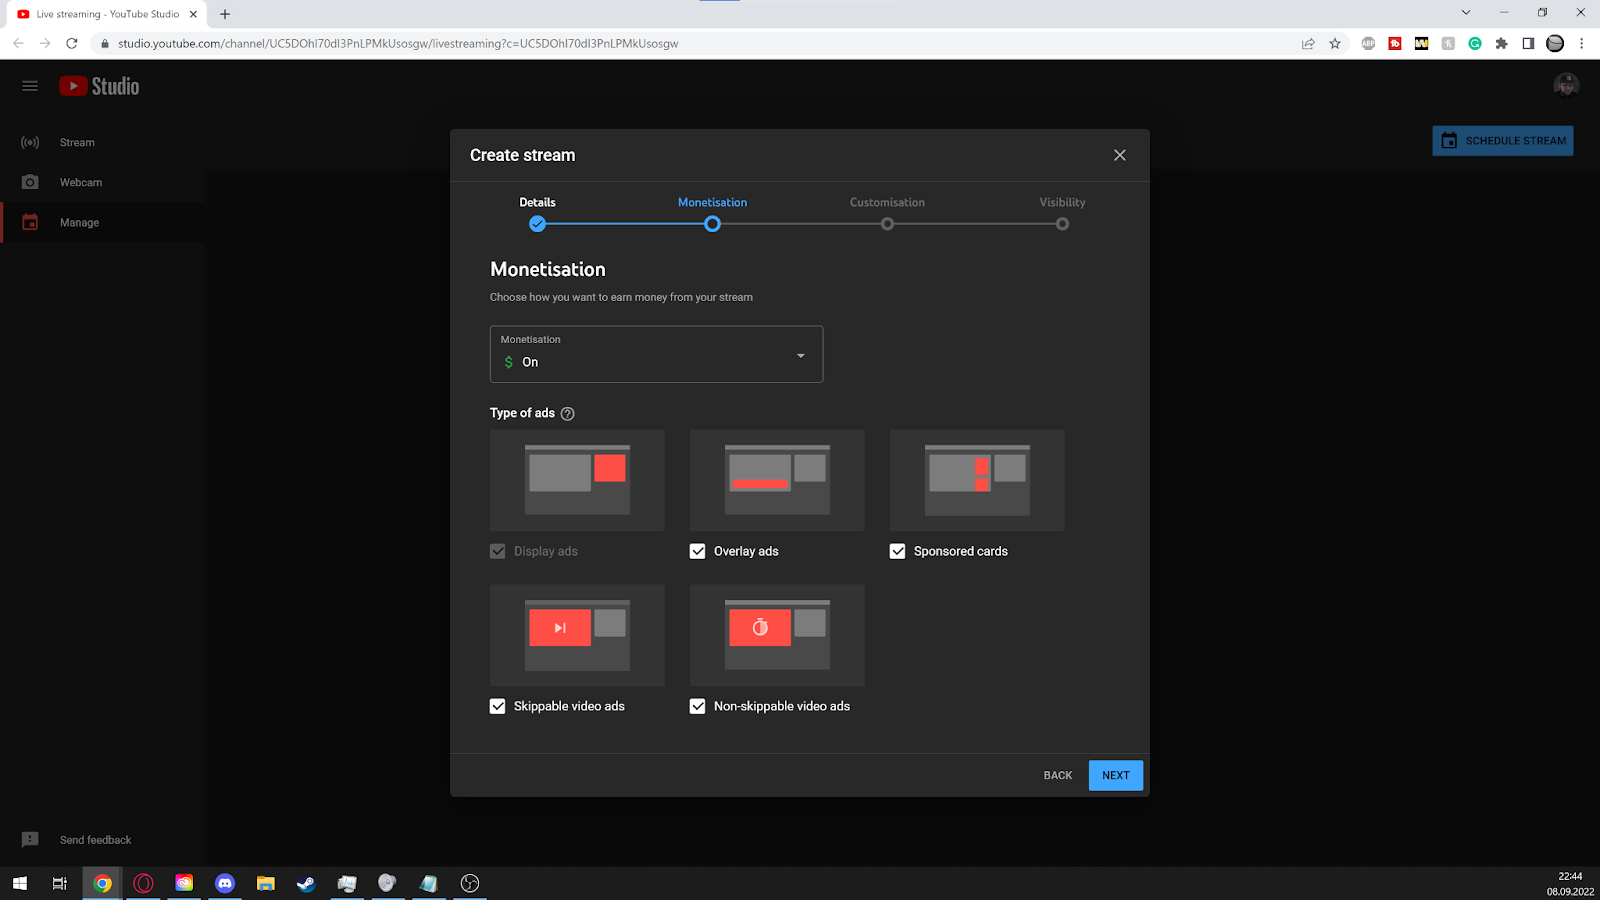
Add different kinds of monetization options
In the customization tab, you can choose chat settings, e.g. who is allowed to chat or if you want to use a slower live chat mode. You can also choose a short trailer for your upcoming livestream that automatically plays on the stream watchpage before your stream starts.
If you already have 1000 subscribers you can choose on what livestream or premiere you want to redirect to after the stream has finished – same as before:
don’t worry you can choose this at a later moment as well.
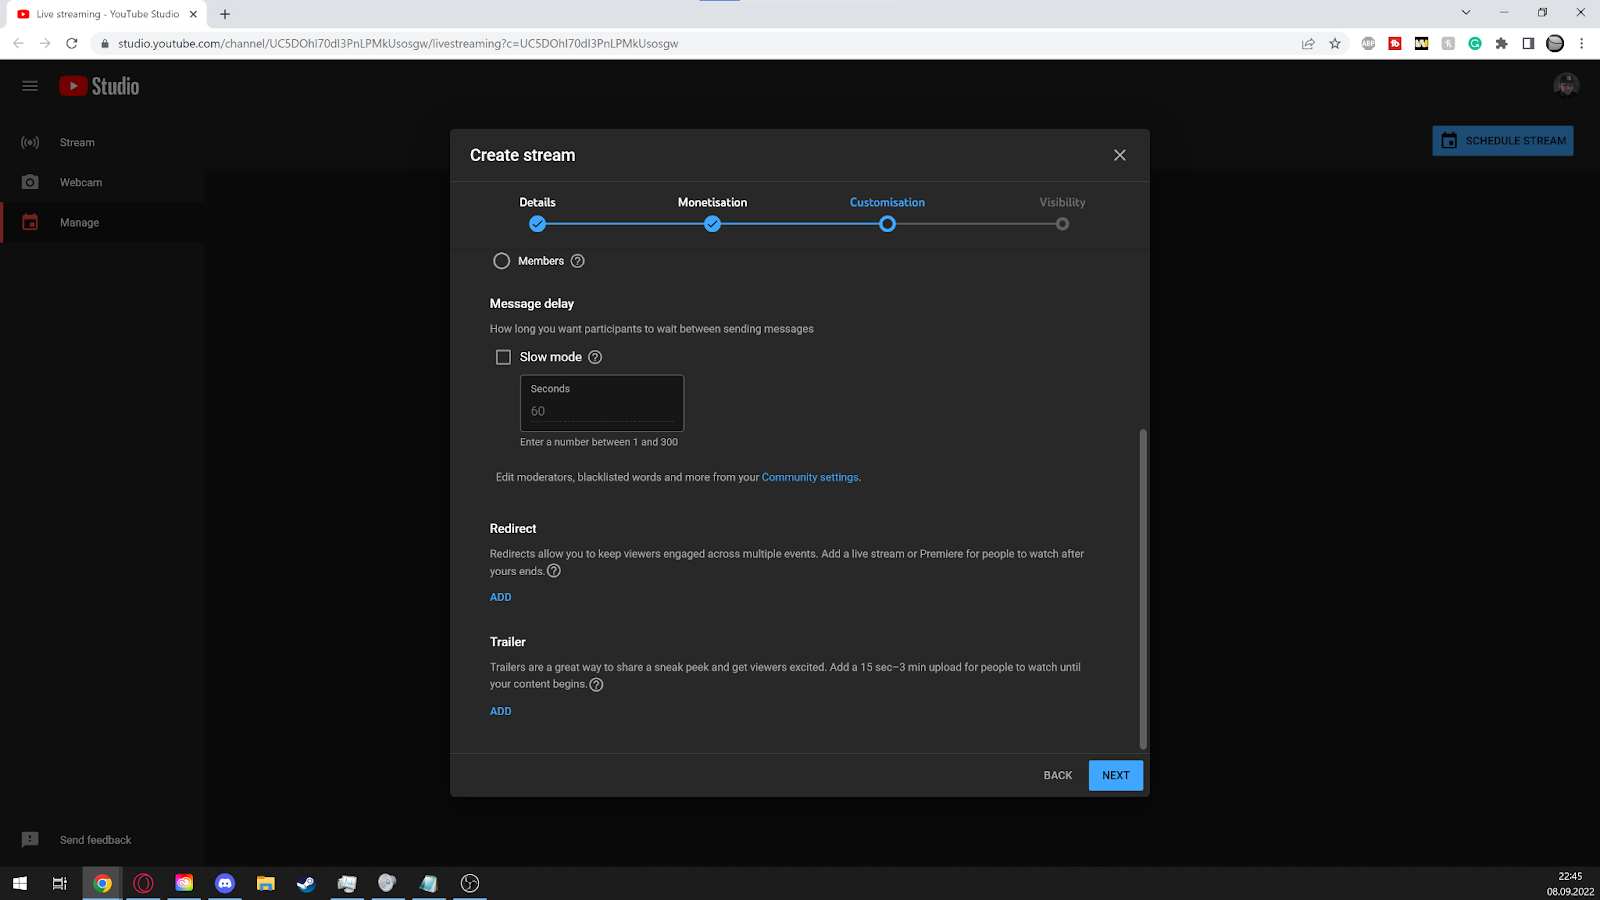
Add chat settings and possible trailers and redirects
If you have already streamed before you will see a blue “Reuse Settings” button. This will allow you to skip most of the Stream Creation Process and already fill out most of the textboxes for you.
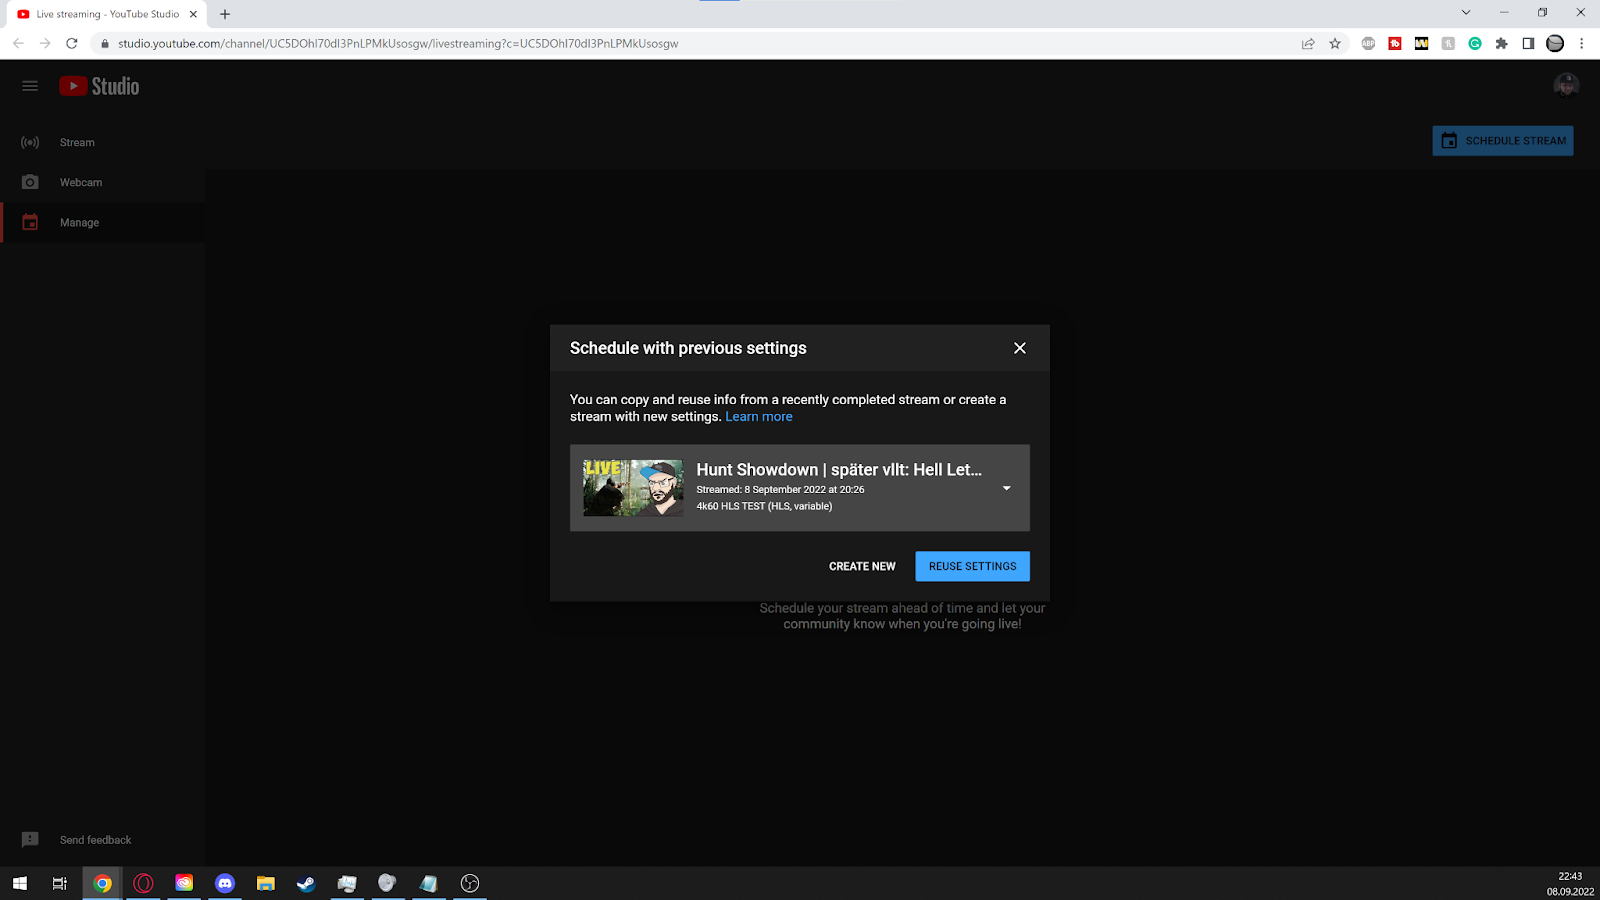
Use the previous stream settings for the next one
Connect OBS to YouTube
If you haven’t yet, read our OBS guide on setting up OBS.
Now let’s get to the exciting part:
If you want to livestream, you either need to connect your YouTube Account to OBS or you need to find your stream key. Since you want to go and do advanced streaming anyway in the future I recommend you invest a little bit of time and get familiar with stream keys, then you don’t have to switch in the future.
You can find your stream key in the Live Dashboard on the left side, and you need to paste it into OBS’ settings → Stream → stream key field.
We recommend to use the RTMP/RTMPS streaming protocol – this should be the setting for your randomly generated default streamkey. Make sure you select the YouTube RTMP Service in OBS, select “Use Stream Key (advanced)” and paste the correct streamkey so your stream can be received by YouTube.
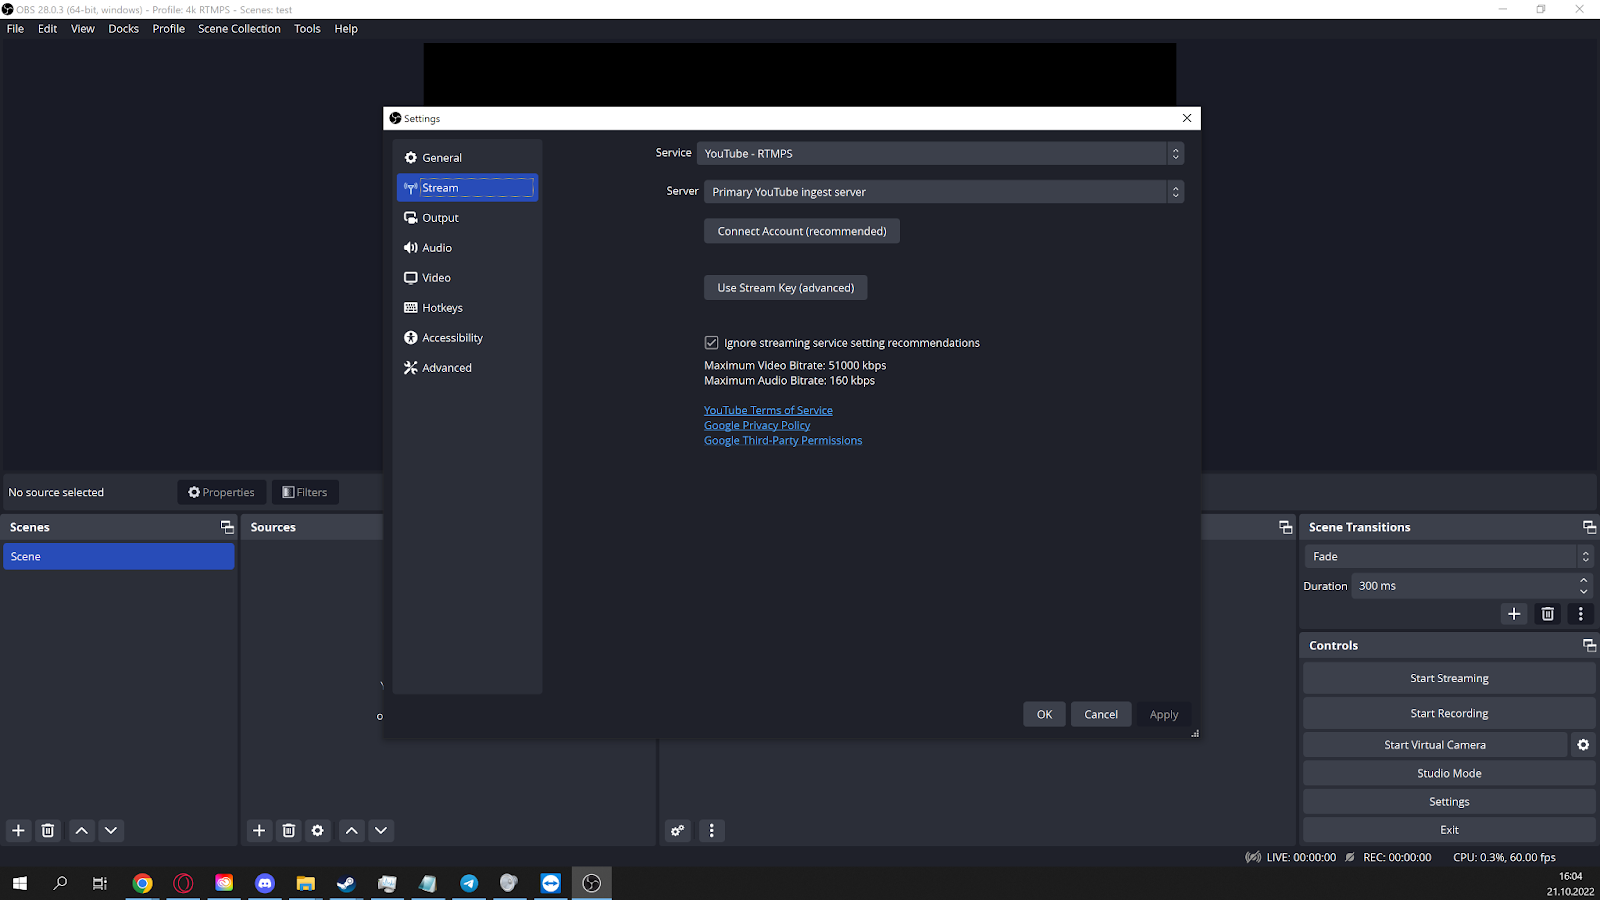
Select the Youtube RTMP/RTMPS Service and click on “use Stream Key”
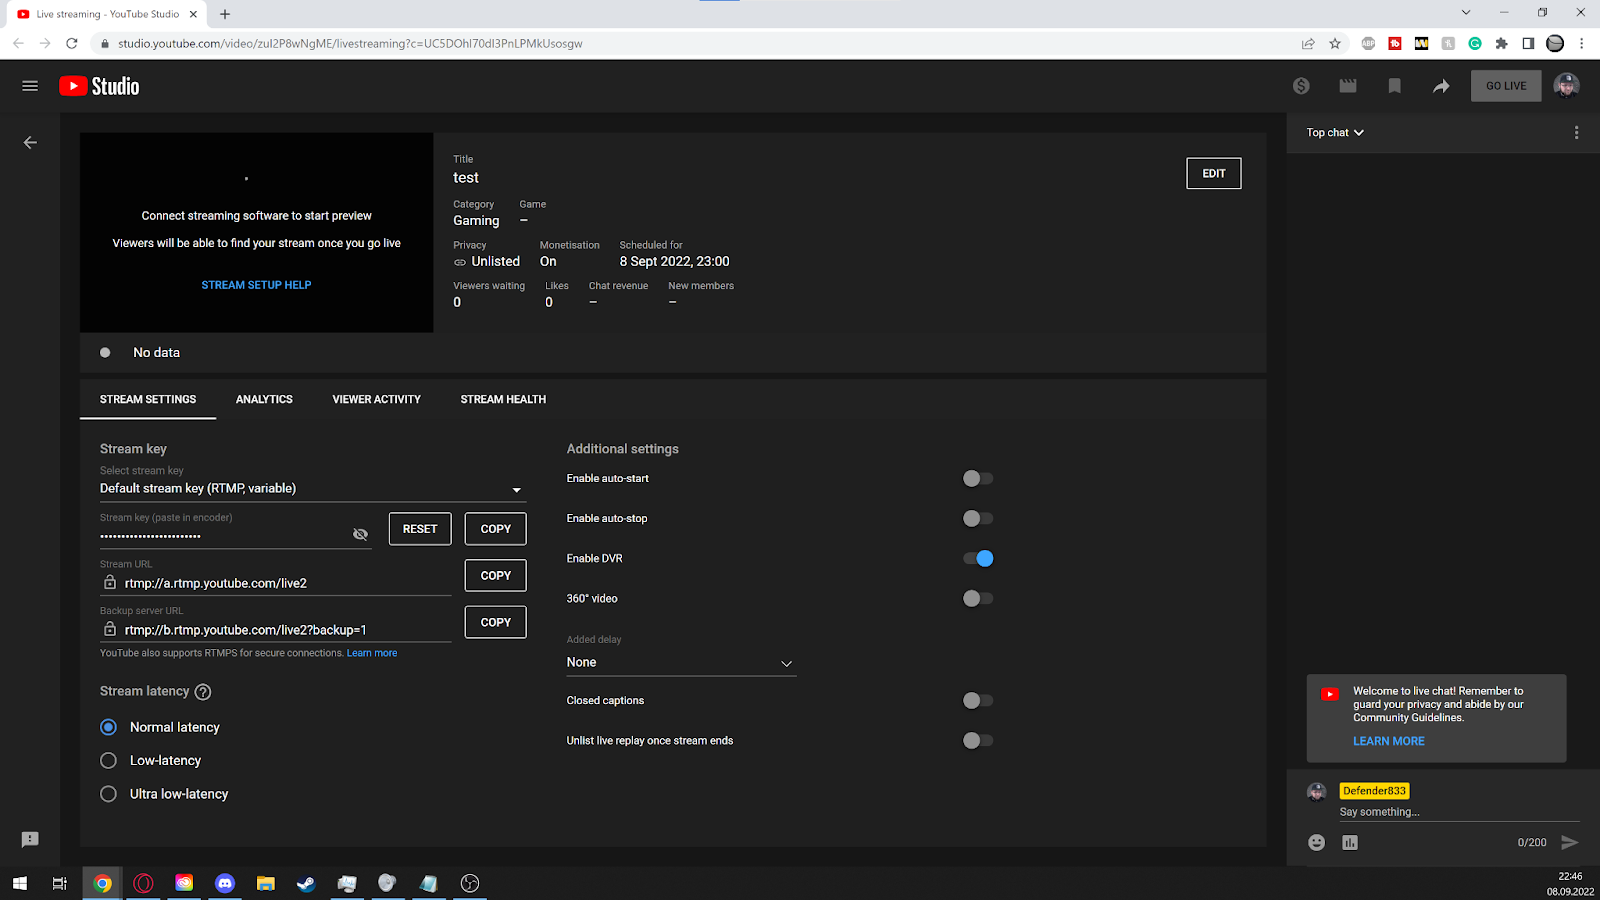
Copy your Streamkey from the LiveControlRoom
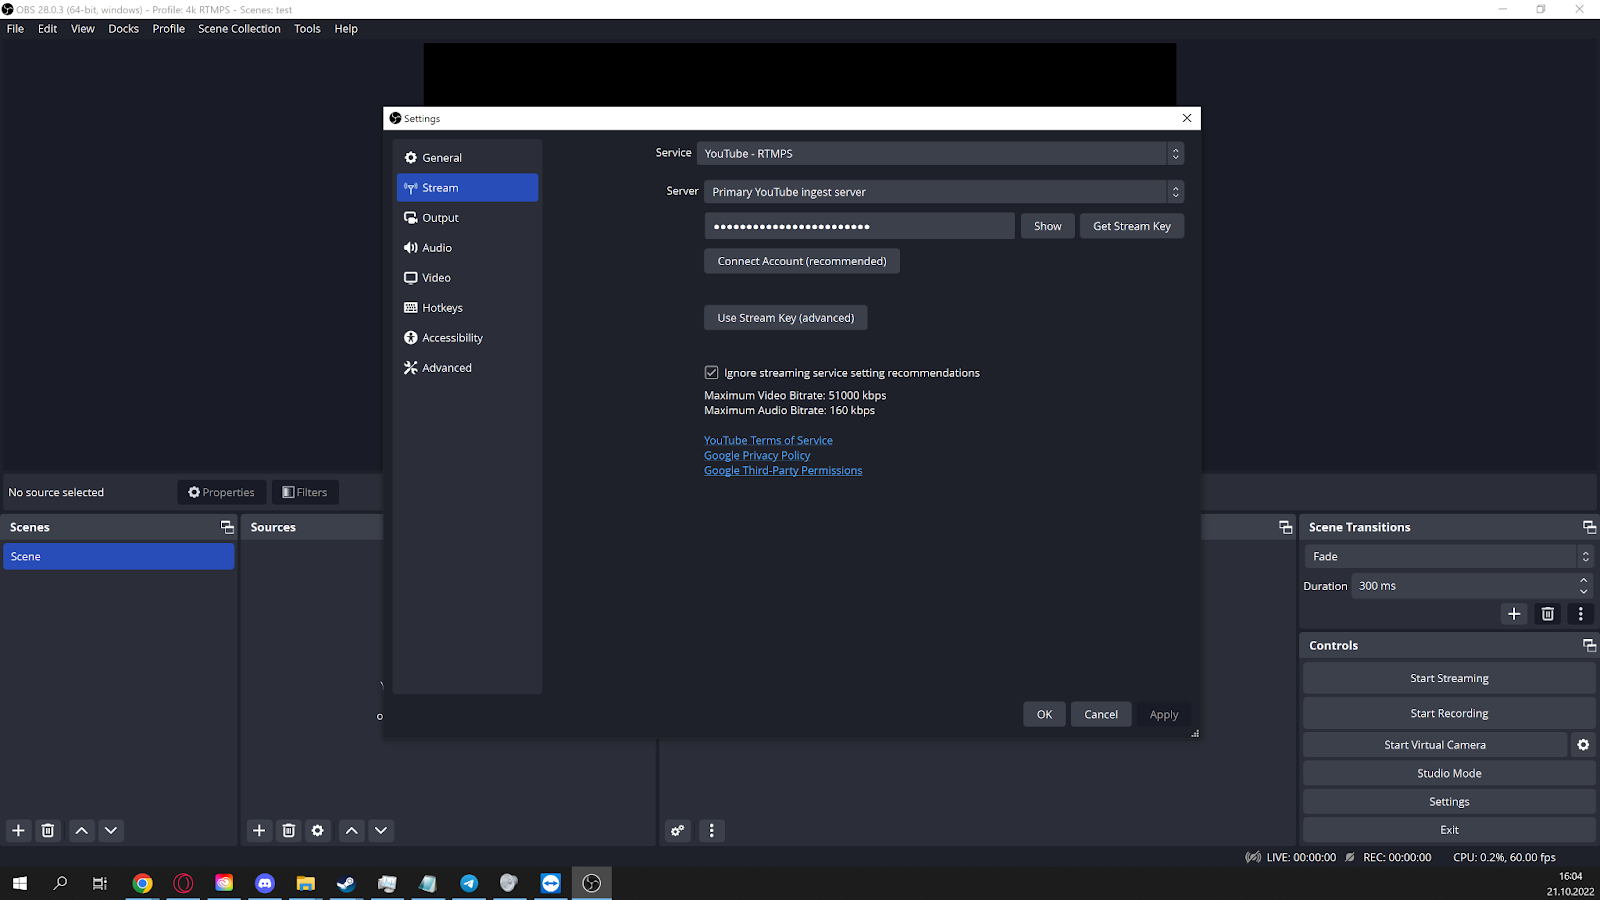
and paste the Streamkey into OBS
By default the stream key is displayed as a string of hidden characters because you are supposed to keep the stream key to yourself so noone can stream to your channel but yourself. If you have the feeling that a stream key is compromised, you can just generate a new one in the YouTube Live Dashboard with the “Reset” button.
Now if you press the “Start Streaming” button in OBS your stream will connect to YouTube and start the preview. You can go live via the big blue “Go Live” button in the top right corner or if you have selected the “enable auto-start” the stream will start once it receives data.
Same goes for stopping a stream:
Unless you have selected the “enable auto-stop” option you will have to manually end the stream with the big red “end stream” button in the top right corner.
Note:
I recommend enabling the auto-start and disabling the auto-stop. This will allow you to jump right into action as soon as you hit “start streaming” in OBS but prevent you from ending the stream prematurely if you accidentally end the stream or have technical difficulties, allowing you to reconnect to the already started stream.
Useful YouTube Streaming Features
YouTube streaming has some unique settings up the sleeve.
For example YouTube let’s you choose one of 3 different latency settings before the stream starts, all of which can be found on the bottom left side in the live dashboard:
- Normal Latency, ~7 seconds delay depending on internet speed on the viewer side, but all resolutions are supported. This is the best setting for a good viewing experience but less suitable for a lot of chat interaction
- Low Latency, ~3 seconds delay depending on internet speed on the viewer side, resolutions up to 1440p60 are supported. This is a good balance between chat interaction and viewing experience
- Ultra Low Latency, <2 seconds delay with the highest demands for a stable & fast internet connection on the viewer side, resolutions up to 1080p60 are supported. This is the best option if you want to have real time interaction with your viewers. With this latency setting viewers might experience buffering due to data ingestion hiccups.
Additionally YouTube allows you to add an artificial delay up to 1 minute, which can be used in competitive environments (esports).
In contrast to other large livestreaming platforms, YouTube offers up to 2 hours DVR (Digital Video Recording) playback. That means your viewers can pause the stream, come back and don’t miss anything.
Keep in mind that while they have paused the live stream, the live chat will continue to show new messages. If they want to catch up they can resume the live stream and set the playback speed to 2x. The playback speed will reset to 1x once the playback has caught up.
You can also disable DVR if you don’t want your viewers to be able to use that feature.
The YouTube Live Chat will let you pin a message to the top of the chat. This pinned message will be highlighted in blue. To pin a message, send the message first into chat like you normally would. Click on the 3-dot menu next to the message and select the “pin message” option. To release a pinned message you can either click on the 3-dot menu and hit the “unpin message” button or repeat the same process as before. The name of the button will change to “replace pinned message”.
The YouTube Live Dashboard natively supports chat polls. You can create a poll by pressing the poll button in the chat area. A new pop-up will open where you can ask the question and give up to 4 possible answers. The poll feature defaults to “Yes” or “No” answer options but you can just rename them. Once the poll has been started, it will be pinned to the live chat and users will be able to cast their vote. Once you end the poll, the results will be posted into the chat.
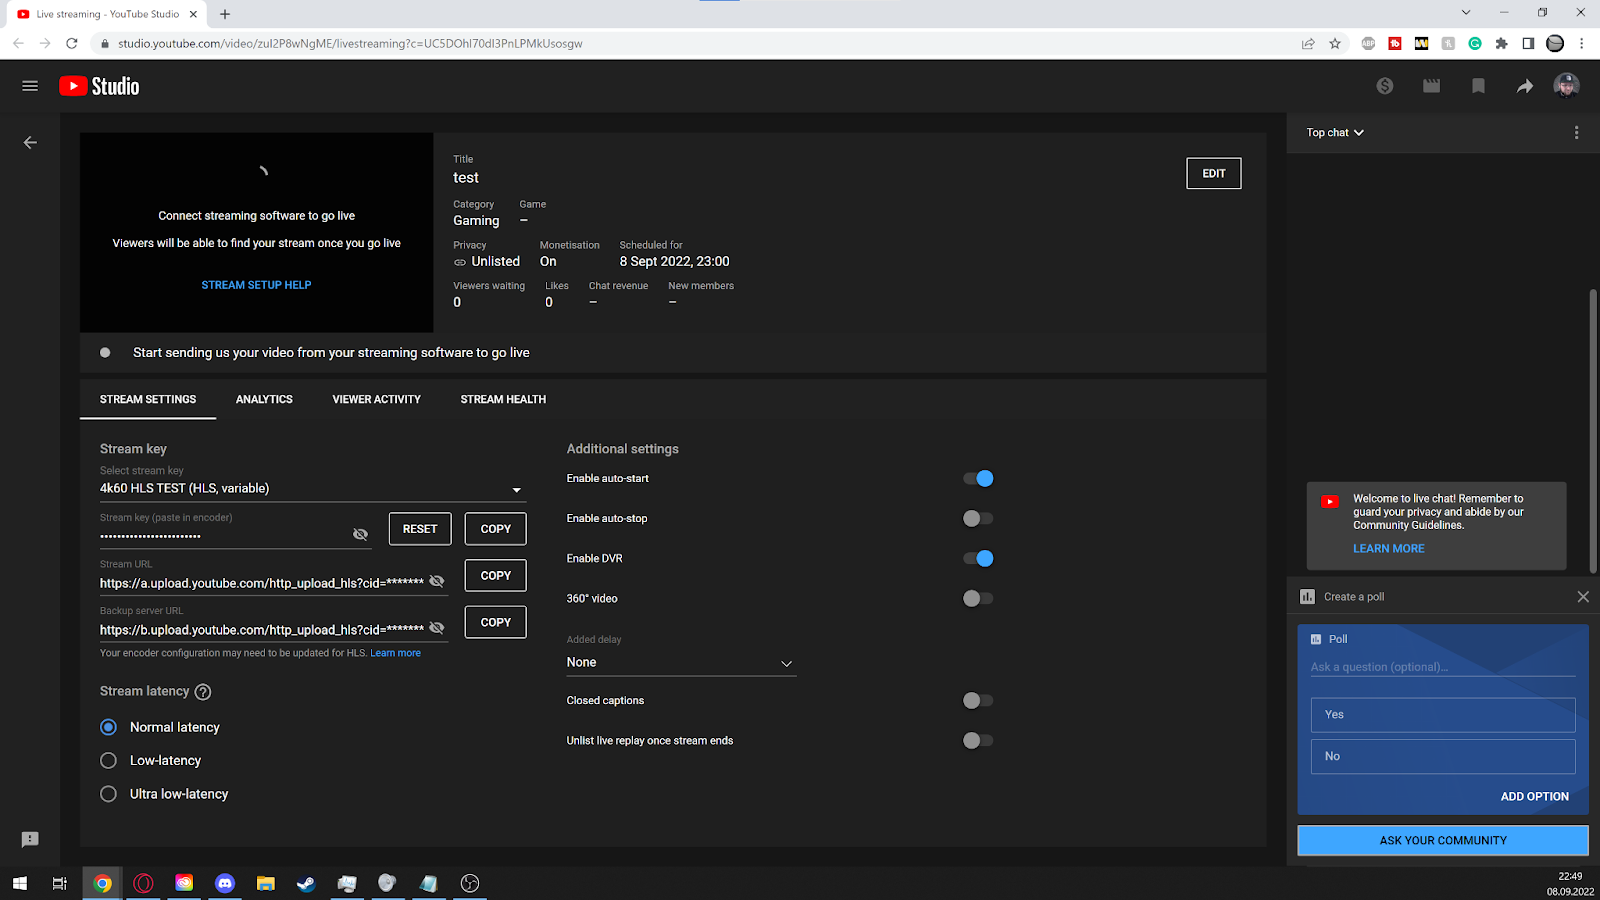
Add Polls to your Livechat
Viewers can also Clip small highlights from your livestream via the watchpage. Unfortunately at the time of writing this guide there is no way to directly see what parts people clipped by the creator. As a best practice: Ask your viewers to share the clips on social media with a special Hashtag or in a dedicated area of your discord server. Dont worry, even if you didn’t create the clip yourself, both views and watchtime will be counted toward your stream archive. This wayFeature you can even create a short with material collected by your fans with YouTube’s Clip-2-Short feature. Keep in mind that YouTube Shorts are one of the most powerful growth tools right now.